
How To Make Snow Candles
It’s weird and unusual, but that icy stuff covering the ground can also be used as a mold for DIY crafts.
By Jessie Schiewe
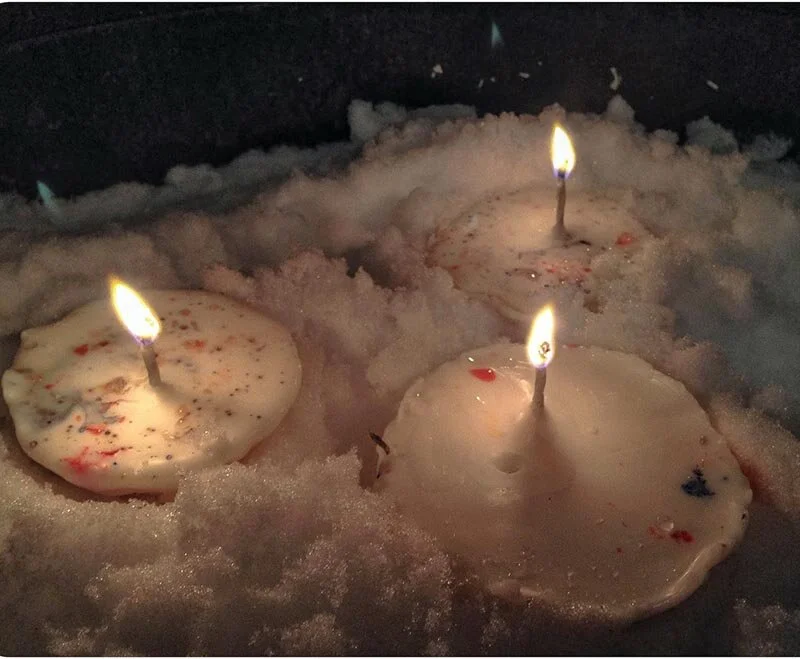
Use Mother Earth’s bounties to make cool, DIY crafts. (Credit: Little Acorn Learning)
If you live somewhere cold, it’s likely already snowing around this time of year. Sure, it might be cold, wet, annoying, and potentially lethal, but when it comes to DIY crafts, snow can actually be kind of useful.
So the next time you feel thwarted by a wall of the white, fluffy stuff, instead of shoveling it aside — and risking a heart attack — consider using it instead as a tool for making candles.
Before you start, be forewarned that your snow candles probably won’t turn out perfectly formed, and might even have a bit of dirt and grass stuck into their wax. But they’re easy to make, require only a few tools and ingredients to whip up, and are a fun and wacky way to take advantage of a snow day.
HOW TO MAKE SNOW CANDLES
Ingredients:
Snow
Old candles to melt down or packets of wax. The blog Reality Daydream recommends using paraffin wax, which is easy to find and inexpensive.
Broken crayons (optional). You can mix these in with your wax to give your candles a tint of color.
Pan of water
A butter knife
Candle wicks
Paintbrushes or long sticks
Getting started:
The first few days after a snowfall are the best times to make snow candles because then the snow won’t be too tightly packed nor too tall. Ideally, you want the holes to reach the ground, so don’t attempt to make them in piles that are taller than 8 inches.
Preparing the wax:
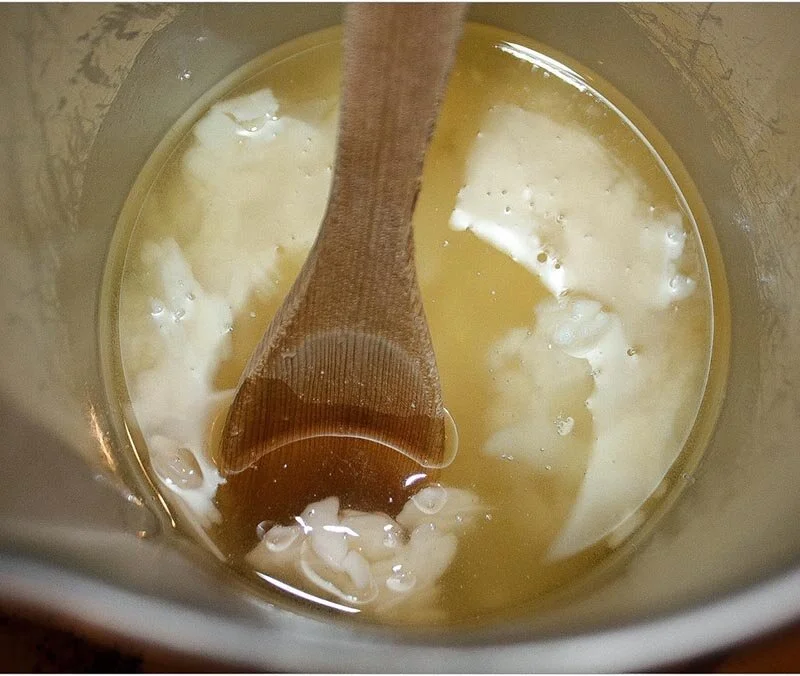
Whether you’ve bought new wax or are melting down old candles, this step will be the most time intensive.
If you’re using old candles, you can ones that are either “naked” or in jars. Set them in a pan of water, bring the water to a boil, and then leave it on a simmer until the wax melts into a liquid.
This could take anywhere from one to two hours. Also keep in mind that when you do this, the old candles will release their scents, so if you’re sensitive to smells, perhaps don’t try to melt a melange of apple cinnamon and pumpkin spice candles at once.
Once the candles have fully melted into a liquid, use a plastic fork to fish the wicks out of the “sauce.”
If you’ve purchased new wax, simply follow the directions on the packaging to melt it. You’ll likely only need a pan and a wooden spoon for stirring the chunks of wax into a more supple texture.
When your wax is fully melted, grab a few potholders and carry your vat outdoors into the snow.
Be forewarned: If you buy scented wax, your house is going to be very smelly. (Little Acorn Learning)
Making the molds:
Though some guides recommend using canning jars or just your fist to dig out holes in the snow, doing so will leave you with some very wide and shallow candles.
If you’re hoping to make tall, slender snow candles, your best bet is to make a hole that’s more narrow using a butter knife. Merely twist it into the snow so that you have a long, narrow opening that’s about two-inches wide (similar to the width of a paper towel tube or toilet paper roll).
Pour it out, pour it out:
Once you’ve made your holes (you might want to make them one at a time instead of all at once), pour in about 20 to 30 ounces of the hot candle wax until it reaches just a few inches below the snow’s surface.
Next, stick your wick in and wrap the end of it around a stick or a paintbrush. Lay the stick or paintbrush across the top of the candle hole so that your wick doesn’t fall into the wax as it hardens.
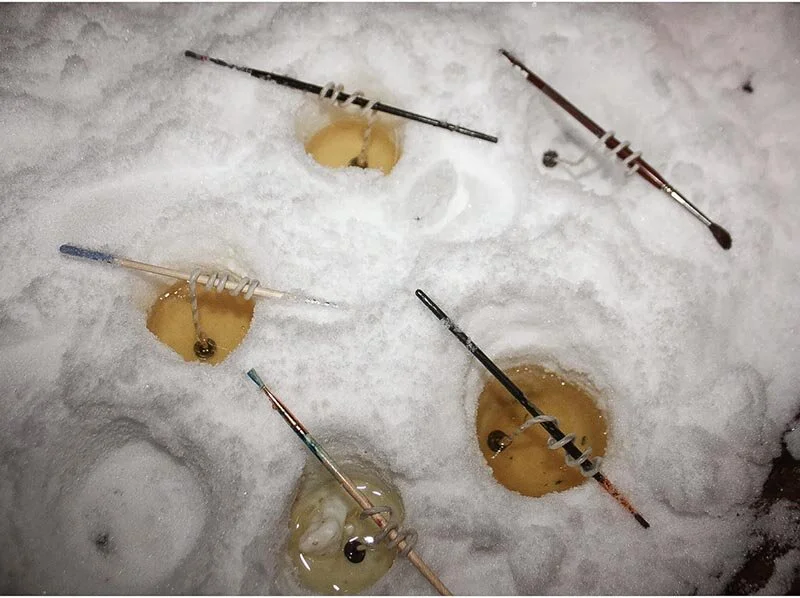
Paint brushes or long sticks will prevent your wicks from solidifying into the wax. (Little Acorn Learning)
The waiting game:
It depends where you are, how cold it is, and how hot your wax was, but it’ll likely take around 30 minutes to an hour for the wax to fully harden in its snow enclosure.
You can test their readiness by touching the top of the wax and seeing if any of the wax sticks onto your finger or if it feels solid.
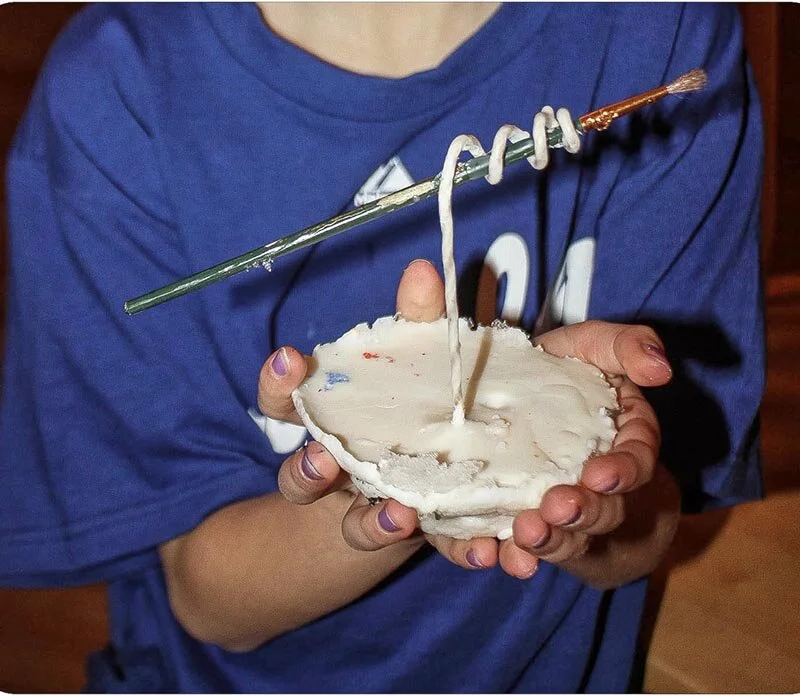
Unearthing your snow candles:
Once you’ve tested the wax and are absolutely sure that it has hardened, use your hands to gently loosen the snow around the candle and fish it out. Yes, your hands might get cold, but if you opt for a shovel, you risk accidentally chopping your candle into pieces.
Once you’ve dug your candle out of the snow, you might have to brush or pry off specks of dirt or blades of grass that got sucked into the wax. Or you can leave it for an au naturel affect.
Tidy ‘em up:
Bring your snow candles inside and snip the wicks to a height of about half an inch. If your snow candle won’t lay flat or is wobbly, use a butter knife to slice the bottom of it to a more even level.
Snow candles are perfectly imperfect. (Little Acorn Learning)
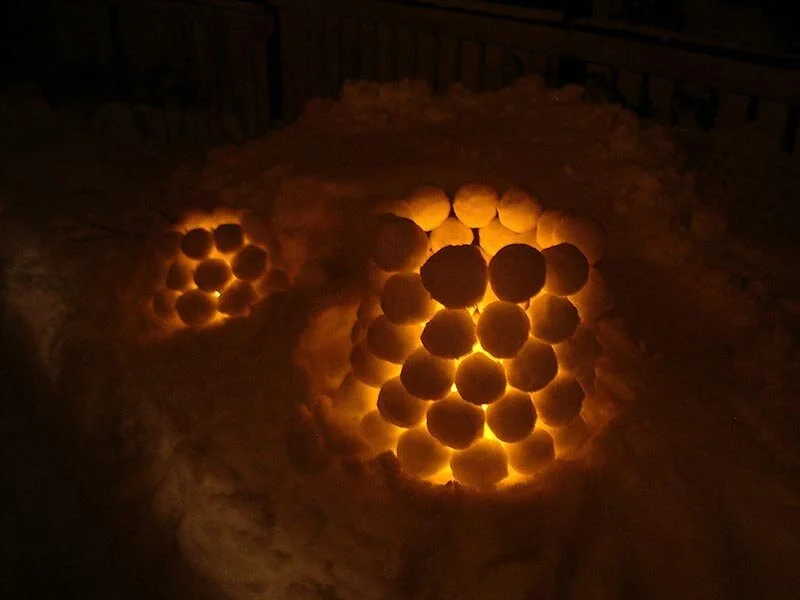
Other types of snow candles:
If you’re too lazy to go through all these motions, there are alternative ways to combine candles with snow. In places like Finland, Norway, and Sweden, it’s common to make snow lanterns by stacking snowballs in a pyramid shape above a burning candle.
“When we were kids, we always built lanterns or snow caves and lit them with candles,” Norwegian Instagrammer iamk_kristinemaudal told OK Whatever.
You’ll have the best luck making these kinds of structures on super cold days, when the air temperature is so frigid that a mere candle is not hot enough to melt the snow.
Flickr user azmuskoka notes that if you use “a small candle, as long as the wind is not too strong, the candle will burn for a few hours.” Just make sure your snowball lantern has a hole in the top of it for the heat to escape.
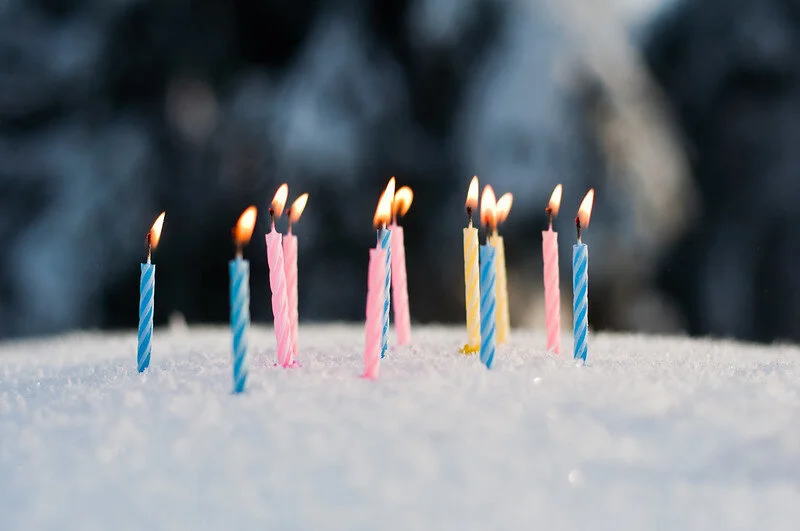
Literal snow candles:
Don’t forget that you can always take the easy road and just stick a few candles into a pile of snow and voila, you’ve got yourself a snow candle that way, as well.
Whether you do this by plopping in birthday candles or by hollowing out a hole in the snow for a fancy votive candle from Anthropologie, there are plenty of ways that you can combine fire and ice this winter — and create a pretty spectacle to boot.
JESSIE SCHIEWE IS THE EDITOR OF OK WHATEVER. SHE BELIEVES IN MERMAIDS AND THRIFT SHOPS FOR EXERCISE.
(This article was originally published on Jan. 13, 2020)
Related articles:


Personal lubricants have other uses beyond the bedroom.